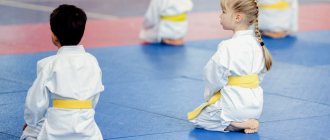
At what age can a child be taught to skate?
Determining at what age a child can start learning to skate is not so easy. It is individual for each baby. The only rule is that you need to teach your child to skate when he already walks and runs confidently. The average age is 4-5 years, but it happens that even at 2 years old children begin to get accustomed to this sport. If you are going to send your child to a section (for example, hockey or figure skating), do not hesitate. Some of them do not accept children over 7 years old.
What to do if you decide to teach your child to ride on his own
Of course, you always have the option to seek help from a figure skating instructor and thus transfer responsibility for your child to a professional. However, this way you are not actually participating in the learning process - and this should be interesting and educational. Therefore, below are the main tips for parents who want to try their strength and skills as an ice teacher.
First of all, show by example that skating is not scary. And to do this, it’s best to get on the ice yourself and skate in front of your child.
Then invite him—just invite him, not force him—to also put on his skates and take a couple of steps.
It is important that the child eventually takes these steps on his own, without support. Only then will he feel confident and realize that he can stay on the ice.
So, the future figure skater is on the ice, stands confidently, and skates too. What's next? Do some exercises with your child:
- “Spring” is a regular squat in place. As deep as you can go on the ice.
- “Flashlight” - alternately widen and close your legs while moving, and let your baby repeat after you.
- “Parallel snake” is the parallel execution of sinuous movements with the legs on the ice, reminiscent of a snake’s twisting.
“The main stages of learning are the initial learning of motor skills, the stage of in-depth learning, consolidation and improvement of motor actions. In the first lessons, teach your child how to walk on ice - stomp. Figure skating is a complex coordination sport. It’s difficult to say how long it will take a child to learn the basics of skating, since all children are different and learn the material differently,” says master of sports in figure skating Kristina Boykova.
Where can I teach my child to skate?
Have you decided to teach your child to ride? Don't rush onto the ice. Conduct your first lessons in a safe environment – at home. Let the child put on the skates and, without removing the plastic covers on the blades, try to stand and walk on the floor in them. Be sure to insure him the first time.
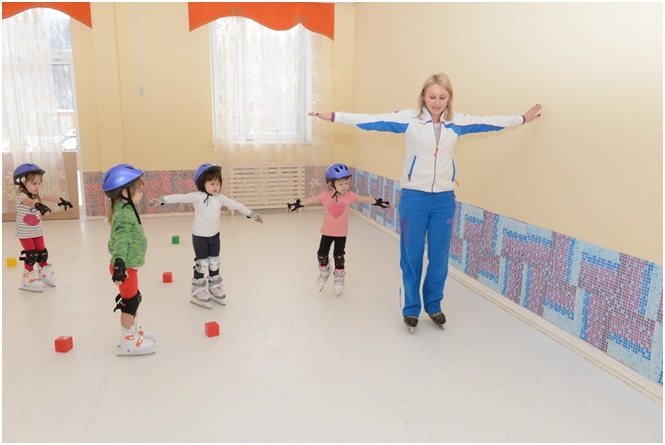
When walking is mastered, offer exercises: squats, jumping, raising and lowering your legs. Show your child the correct stance: feet shoulder-width apart, knees slightly bent, body tilted forward. After a 2-day rehearsal at home, go on the ice.
Learn to skate
When going out on the ice for the first time, it would be a good idea to immediately practice the learned techniques - this should help the child overcome fear and embarrassment when skating.
After a fall, you first need to kneel down, bring your skates together and begin to rise. If you try to stand up using your hands, the child will slip and fall again.
At first, the boy will not be able to spin on the ice. At this stage, you need to learn how to stand on the ice: your legs should be slightly bent at the knees, and your torso should always be tilted forward.
The child's failures may upset him, and he will no longer want to ride. Under no circumstances should you scold or laugh at your child because of his failures. The task of any parent is to cheer up their child.
While riding, it is necessary to constantly monitor the position of the child’s back and correct it when necessary.
Ice skating exercises
- Raising your legs. One of the primary exercises. Improves baby's coordination. The essence of the exercise is to bend and pull your legs to your chest from a standing position, alternating left and right.
- "Penguin". First we make several movements forward, then we start moving backwards.
- "Spring legs." Another lesson on coordination, its essence is simply simple: you just need to squat in place.
- "Spotlight". In this exercise, you need to bring your heels together, your toes apart, and diagonally bring your legs in and out.
- "Snakes." The child's task is to draw two crawling snakes with skates, simultaneously moving forward.
The first task is to teach how to fall
Children usually don't want to go on the ice because they are afraid of falling. The primary task of parents is to explain that this cannot be done without it, and to teach them to fall correctly. Explain to your child that this will help avoid injury.
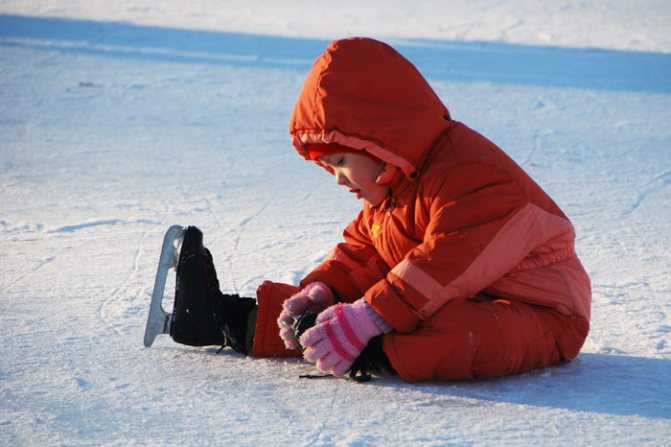
When you first go on the ice, immediately teach your child to fall. Explain to your child that:
- the lower the height, the safer it is to fall, so if you start to fall, you should sit down as low as possible;
- it is important to group yourself - press your limbs to your body, if you put your elbow forward, you can seriously hurt yourself;
- the most important thing is to protect your head, that is, not to fall forward or backward, the ideal option is to the side.
Attention: if this is your first time, take care of your baby’s safety. Wear knee and elbow pads and thick clothing.
Where to start
You need to start skating lessons with the ability to maintain balance and not fall. To do this, you can cover the blade with thick paper so as not to damage the flooring and teach your child to move and stand on skates at home. When he can walk on them freely and not fall, you can take him out onto the ice.
In summer, you can use roller skates to continue learning. Of course, the riding technique is different, but the principle is the same. If parents want to enroll their child in ice skating classes, they will be faced with a choice between hockey and figure skating.
Hockey is a difficult sport that requires athletes to have a strong physique, lightning-fast reactions and the ability to calculate their actions in advance. It is better to send your child to hockey only after he reaches 5 years old. For hockey, you need to purchase a large amount of protective equipment and also the skates and stick themselves.
Figure skating is a non-aggressive sport that involves mastering various techniques and elements of skating. You can enroll your child in figure skating classes from the age of 4. Until this age, you can learn new movements on your own.
For a successful start to skating, it is better to choose artificial ice. It has a uniform structure, smooth surface without irregularities. Thanks to this, the child feels more comfortable and falls less often. Moreover, skating on natural ice areas has many dangers associated with the risk of falling through the ice.
What's next?
Now let's look at how to properly teach a child to skate. When he is no longer afraid of ice and knows how to fall, we move on to the process itself.
Keeping your balance
Let the child, holding onto a support, try to stand and learn to maintain balance. Roll him on the ice, holding his hands. Let him try to take a few steps.
"Herringbone"
Learn with your child the basic rule of moving on ice; the “Herringbone” exercise will help with this. The legs should be placed at an angle to each other, the heel of one leg should rest against the middle of the foot of the second. With the leg that is behind you, you should push off from the ice surface and slide onto the second one. The legs need to be changed one by one. Transfer the weight to the leading one (which is in front). Support your child: let him do the exercise while holding his hand.
"Spring"
The “Spring” exercise is regular squats, only on ice. Ask your child to do it. At first, let him hold on to your hand or side.
"Flashlight"
The next exercise is “Flashlight”. You need to place your feet parallel at a distance of 20-25 cm from each other, and while moving, spread your legs and bring them together. There will be a trail of lanterns left on the ice, hence the name.
"Snake"
Ask the child to stand and place his feet at a distance of 20-30 cm. Let him, trying to maintain this distance, turn his legs left and right. A winding path should form on the ice.
Braking
After the child has learned to balance and ride, he should be shown how to slow down and brake. There are 3 ways to reduce speed on ice. Tell your child about all of them, and let him choose the most convenient one.
- The toes of the feet are gradually brought together (but not closely). After a couple of meters the speed decreases.
- The second way is to shift your weight to your heels. You need to bend your legs more at the knees and press your weight on your heels without moving your body back.
- You can brake with one foot. This method is the most difficult. You need to put one foot forward, perpendicular to the movement, and press the blade on the ice until it stops.
It’s okay if your child fails to brake during the first training session. Support him and don’t criticize him, then there will be results.
Ice skating technique
"Martin"
After practicing all the previous exercises, you can proceed directly to skating. “Swallow” is an ice skating technique that has elements of the “Spotlight” exercise: heels together, toes apart, the movement occurs by alternately throwing the legs forward.
After an hour, the baby will begin to more or less make jumps on skates, which means it’s time to learn braking.
Stop
In order to slow down and stop sliding, you must:
- While moving, continue to teach the child to keep his knees bent and his feet shoulder-width apart.
- Now throw one leg across the movement, placing the blade of the skate at a slight angle.
- Pressing your foot on the front blade, begin to brake. The center of gravity must be shifted to the back leg.
When the baby gets used to performing the simplest braking, it’s time to teach him to stop with both feet. The exercise is similar to stopping with one leg, but now we place both legs across the movement, shifting the weight to the front of the body.
After carefully studying the material in the article, you will no longer have the question of how to teach a child to skate.
How to teach a child to roller skate?
If you decide to teach your child to roller skate, you should show them the first exercises at home. Let the child try to stand and walk like them on the carpet and floor. Then you can go outside, but look for deserted places to avoid injury.
At first, hold your child's hand. Trainers recommend performing the same exercises on roller skates as when learning to skate - “Snake”, “Spring”, “Flashlight” and others.
But the braking technology will be very different. The methods are as follows.
- T-stop braking. It is performed like this: one leg is in front, the second is behind at an angle of 90 degrees to the first. The foot that is behind you needs to press on the asphalt until it comes to a complete stop.
- The second method is braking using the standard brake. While riding, you need to push the roller with the brake forward, then, lifting your toe towards you, touch the ground. Braking will be slow, but this method is the easiest to learn.
- Rotational braking. This is the fastest way. When you need to stop, make a U-turn in a circle with a diameter of approximately 2 m. You can imagine that there is a car tire ahead and go around it. More experienced riders rotate around their axis after stopping; this is more difficult, but looks more impressive.
Let the child choose the method he likes. Help him, and after a while he will start skating well.
Errors
- The most common mistake parents make when skating is excessive control. Mothers do not want to let go of their child even for a moment and always roll him by the hand, even if the baby is against it. If a child thinks that it is time for him to become independent, do not interfere with him, otherwise everything will end in resentment and unpleasant memories of skating.
- One of the reasons for failure on ice is constant loss of balance. In order for the child to learn to distribute weight, it is worth repeating the above exercises a couple more times.
- Balance on skate teeth. The answer to the question of which skates is best for a child to learn to skate on is hockey skates. At first, it will be difficult for the little one to maintain balance; at this stage, you need to take hockey skates - they do not have teeth, and the child will not get used to balancing using them.
- Knee position. While skating, your legs must be strictly bent at the knees, otherwise there can be no talk of any movement.
- Criticism. If you constantly complain and tell your child that he is doing everything wrong, this may discourage him from wanting to ride. Understanding will come with time: you don’t need to demand everything at once.
Teaching a child to skate is not an easy task and requires a lot of willpower. When your child grows up, he will be immensely grateful to you for the emotions that skating lessons with his parents gave him. The editors of the site hope that we have helped you in training your young athlete.
“How to teach a child to skate” consultation on the topic
Consultation for parents
“How to teach your child to skate”
For a child, ice skating is a wonderful form of relaxation and physical activity, but before the child gets real pleasure from gliding, we, the parents, will have to try a little. You can, of course, send your child to a sports section for hockey or figure skating, where he will be trained professionally by coaches. However, if the goal is not to raise an athlete, but simply to learn to skate for your own health and pleasure, then it is quite possible to cope on your own.
About age
Nowadays, it is not uncommon to see how children are taught to skate almost simultaneously with learning to walk normally - about one and a half years! And at the age of 8-9 years, the doors of most sports schools are already closed to children. But I think there is no need for fanaticism in this matter. The golden mean is good here too. The standard age for starting education is 4 years. It's better to stick to it. In addition, there are children whose leg, back and abdominal muscles (which are involved in ice skating) are so weak that they cannot even stand on skates. In this case, you should wait and start strengthening these muscles. General developmental exercises are suitable - goose step, lunges, squats, jumps. Before each trip to the skating rink, it would also be good to do a short warm-up using these exercises.
Learning...to fall!
Yes, this is the first thing you should teach a child. After all, once on the ice, he can become completely confused. It is natural for us that ice is slippery. To a child, the situation may seem hopeless. First, you can practice at home by spreading a folded blanket several times. You need to teach your child to group and fall on his side. The same should be done on ice. Falling backwards, which hurts the head, is especially dangerous. Let the child try to fall on his side, without putting his arms out, but with a “roll,” and get up on his own. The child’s weight is not that great, and his height is smaller than ours, so don’t worry too much about him. At the same time, during your first outings on the ice, try to ensure that the falls are mostly planned, training ones. Otherwise, frequent falls will cause fear and aversion to ice.
Skating technique
First you need to master the simplest exercises:
— Walk to the edge of the platform with a side step.
- “Spring” (squats in place).
- Walking forward. And not like skiing (gliding with straight legs), but lifting your feet off the ice.
When the child learns to perform all these exercises, you can begin to slide one leg longer, then the other. Or push off and ride on both feet. If you brought a very tiny person onto the ice, for training at first you can use an inverted stool, holding on to which he will move. It is imperative that the child feels all the charm of sliding. To do this, you can tow it around - it can hold on to a ski pole, hockey stick, or rope. It is important that he does not hold on to your hands, because then he can hang on them, and we need the child to maintain his balance himself. When the child can slide and move independently on ice, the minimum program is completed. If you know some elements of skating (“Christmas tree”, “pistol”, “flashlight”), then you can teach them to your child; if not, it’s also not scary. You can simply enjoy sliding or race, or you can borrow movements from other vacationers on the ice.
Physics instructor culture
A. G. Mezentseva